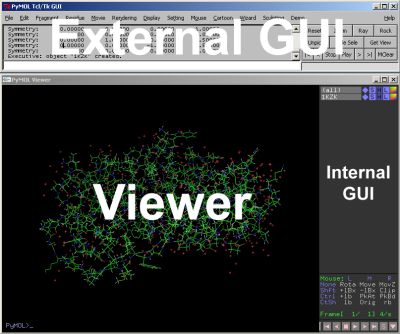
PyMOL's two windows.
Click on the Start menu, follow it to Programs (or All Programs on Windows XP), and then release the mouse on PyMOL .
Double-click on the PyMOL icon in the Applications folder on your main hard drive
Various command line options can be included under both Windows and Unix to automatically open files and launch scripts. See "launching" in the reference manual for more information on these options.
At the command prompt, issue:
c:\program files\delano scientific\pymol\pymolwin.exeIf PyMOL in installed somewhere nonstandard, then use the correct drive letter and path.
If you installed using using a package such as an RPM, then there is a good chance that "pymol" is already in your path. If not, then edit pymol.com in the PyMOL distribution and make sure PYMOL_PATH points to the actual location of the distribution. Enter ./pymol.com to start pymol. You will probably want to create a link "pymol" from this file in to a "bin" directory in your path so that you can launch the program anywhere by simply entering "pymol ".
PyMOL normally starts with two windows: The Viewer Window and the External (Tcl/Tk) GUI Window.

GUI is an abbreviation for Graphical User Interface, which usually consists of menus, buttons, text boxes, and other familiar gadgets. By default, PyMOL actually has two GUI's: (1) an "Internal" GUI which appears inside the Viewer Window, and (2) an "External" GUI which appears inside of its own window. The reasons for this are boring and technical, but know that both GUI's will eventually be unified into a single interface in the future.
The PyMOL Viewer represents the heart of the PyMOL system. This is a single OpenGL window where all 3D graphics are displayed and where all direct user interaction with 3D models takes place.

The Internal GUI contained within this window (right) allows you to perform actions on specific objects and specific atom selections. From top to bottom, it contains an object list, a mouse button configuration matrix, a frame indicator, and a set of "VCR"-like controls for working with movies.
The Viewer also contains a command line (bottom) which can be used to enter PyMOL commands. It is also possible to view PyMOL text output in the Viewer window. you can hit the ESC key anytime to toggle between text and graphics mode inside the Viewer window.
The PyMOL Viewer can be run all by itself, and it provides the complete capability of the PyMOL core system. If desired, the Command line and Internal GUI can be disabled. Many tasks can be made easier and more efficient through use of standard menus and controls. For the most part, such gadgets are currently found in an External GUI window.

By default, PyMOL comes with a single external GUI window which provides a standard menu bar, an output region, a command input field, and a series of buttons. One important advantage of the external GUI window is that standard "cut and paste" functions for text will only work within the External GUI, and not within in the PyMOL Viewer. Furthermore, you must use Ctrl-X, Ctrl-C, and Ctrl-V to cut, copy, and paste because a standard Edit menu has not yet been implemented.
|
Notes For Developers: External GUIs are the foundation for modularity and customizability in the PyMOL system. These windows constitute independent processes (or threads) which can control the behavior of PyMOL, and potentially interact with other programs. They are completely customizable at the Python scripting level, and mutiple external GUIs can exist at once (within the restrictions of Tkinter and wxPython). External GUIs communicate with PyMOL through the Python API (Application Programming Interface). Those of you who want to link up you own programs with PyMOL should generally use a separate external GUI window to control the interaction, rather than changing internal PyMOL code. That way the programs will continue to work together even while development on each program proceeds independently. The internal GUI and all external GUI windows can be enabled and disabled using simple command line options (see reference for "launching"). |
The default external GUI provides a standard Open... item in the File menu which you can use to select the file you wish to open.
   SYNTAX

      load <filename>

   EXAMPLE

      load test/dat/pept.pdb
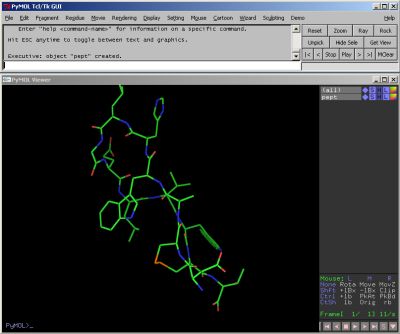
In PyMOL, the mouse is the primary control device, and keyboard modifier keys (SHIFT, CTRL, SHIFT+CTRL) are used in order to modulate button behavior. A three button mouse is required for effective use of PyMOL, but common mice such as the Microsoft Intellimouse and Microsoft Wheel Mouse will work just fine under Windows.
On mice with a scroll wheel, you can push down on the wheel in order to use it as a middle button.
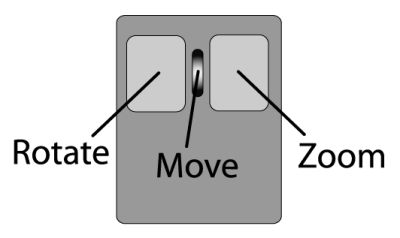
Here is a table of the basic mouse button/keyboard combinations for view manipulation:
| Keyboard Modifier | Left Button | Middle Button | Right Button |
|---|---|---|---|
| (none) | Rotate Camera
(Virtual Trackball) | Move Camera in XY
(In Plane of Screen) | Move Camera in Z
(Scale) |
| Shift Key | Move Clipping Planes | ||
| Control Keys | |||
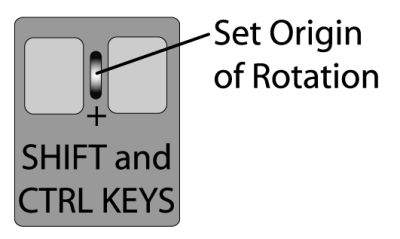
| Control and Shift Keys | Set Origin of Rotation |
An abbreviated version of this table, the Mouse Matrix, is always displayed in the Internal GUI, in order to help you remember which key and mouse button performs which action:
| L | M | R | |
|---|---|---|---|
| None | Rota | Move | MovZ |
| Shft | Clip | ||
| Ctrl | |||
| CtSh | Orig |
When using PyMOL on a laptop, it may be necessary to attach an external mouse or reassign the particular mouse controls you plan to use onto the reduced set of buttons that you have available internally (see reference on the "button" command).

Virtual trackball rotation works as if there is an invisible ball in the center of the scene. When you click and drag on the screen, it is as if you put your finger on the sphere and rotated it in approximately the same manner. If you click outside the sphere, then you get rotation about the Z-axis only. Generally, the view will be easiest to control by either clicking in the center of the scene and moving outwards (mostly XY-rotation), or by clicking and draging around the edge of the screen and moving in a circular fashion (Z-rotation).
PyMOL's clipping plane control is somewhat unusual and may take a few minutes to get used to. Instead of having separate controls for the front and back clipping planes, controls are combined into a single mode where up-down mouse motion moves the front (near) clipping plane and left-right mouse motion controls the back (far) clipping plane.
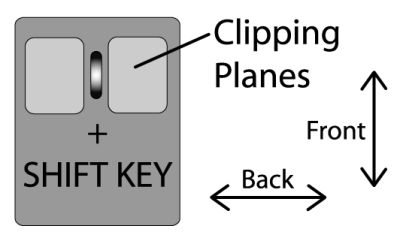
The advantage of the PyMOL clipping plane control is that tedious tandem manipulations of the clipping planes now becomes easy through the diagonal motions shown below.

You can also use the "clip" command to control the clipping planes.
When visualizing molecules, it is frequently necessary to change the origin of rotation so that you can inspect a particular region of the molecule. The fastest way to do this in PyMOL is to Control-Shift-Middle-Click on a visible atom in the scene.
At this point, we recommend that you spend five or ten minutes getting comfortable with the controls described in this chapter. Specifically, you should be able to accomplish the following tasks: